

Quick Answer
Easy nail designs are beginner-friendly nail art techniques that require minimal tools and no professional training. From half-moon accents to negative space and dotticure patterns, these styles can be completed at home in under 30 minutes and look polished enough to pass for salon work.
You’ve spent forty-five minutes on a nail design Pinterest promised was “beginner-friendly” — and you’ve ended up with something that looks like a kindergartner had a very ambitious afternoon. Sound familiar?
The truth is, most tutorials skip the actual fundamentals. They show you the glamorous end result, not the small decisions that make easy nail designs actually work: nail prep, the right brush sizes, when to use tape vs. freehand, and why some polish formulas cooperate and others ruin everything.
This guide is different. You’re going to walk away with a real understanding of which designs suit your skill level right now, what tools make the biggest difference, the most common beginner traps — and a step-by-step framework so your next manicure genuinely impresses people. Not just the person doing it.
What “Easy Nail Designs” Actually Means (And Why It Matters)
Here’s what nobody tells you: “easy” in nail art isn’t about how the design looks — it’s about how forgiving the technique is. A design with crisp geometric lines can be simpler to execute than loose florals, simply because tape does all the hard work for you.
Easy nail designs fall into three categories: ones that hide imperfections naturally (like marble or abstract swirls), ones that use tools instead of freehand skill (tape manis, dotting tools), and ones where a single color does most of the work (French tip, negative space). Understanding which category a design belongs to tells you exactly how much technique it actually demands.
This distinction matters today more than ever. A 2023 survey by Statista found that at-home nail care products made up over $1.2 billion in U.S. sales, driven largely by people who want salon-quality results without booking appointments. The demand for genuinely achievable techniques has never been higher — and the good news is, the tools available to DIY enthusiasts have genuinely caught up.
Pro Tip: Before deciding a design is “too hard,” identify which of the three categories it belongs to. If it’s tape- or tool-based, you can almost certainly do it on your first try — regardless of how impressive it looks in photos.
How Nail Art Techniques Actually Work (The Part Tutorials Skip)
Most beginners approach nail art backwards. They pick a design they love, then try to figure out the technique. Professionals do the opposite: they understand a handful of core techniques, then apply them to hundreds of different looks.
The Five Core Techniques Behind Most Easy Designs
Almost every beginner-friendly design you’ll ever see relies on one of five methods: color blocking (using tape to divide the nail into sections), dot work (using a dotting tool or bobby pin), stamping (pressing pre-made patterns onto the nail), gradient/ombre (sponge blending), or accent nails (making one nail a statement while the rest stay simple). Master these five, and you can recreate virtually any “easy” design you find online.
The secret pros know is that nail prep accounts for roughly 70% of the final result. No matter how skilled your technique, polish applied over oily, uneven, or poorly shaped nails will peel, bubble, or chip within 24 hours. The actual art? That’s the last 30%. This is why professionals spend disproportionate time on buffing, priming, and basing before they even open a color.
Think of it this way: a perfectly prepped nail with a simple one-color design and a clean topcoat will outlast and outshine a fancy multi-step pattern on a nail that wasn’t properly dehydrated. Simple designs executed correctly always beat complex designs rushed.
Pro Tip: Apply a dehydrator or rubbing alcohol before your base coat, even if your nails don’t feel oily. Natural oils — invisible to the eye — are the number one cause of premature chipping in at-home manicures.
Common Mistakes People Make With Easy Nail Designs
Most people get this completely wrong: they assume more polish equals better coverage. In reality, thick coats are the single biggest destroyer of nail art. Polish that’s applied too thickly takes far longer to dry, smudges easily, and creates a gloopy texture that makes even simple designs look amateur.
Thin layers — applied in three quick strokes (center, left side, right side) — dry faster and build cleaner opacity. Two thin coats always beat one thick coat. This sounds obvious until you’re staring at a translucent first coat and the temptation to glob on more hits. Resist it every time.
The second most common mistake? Not waiting long enough between layers. The surface of nail polish can feel dry while the underneath layer is still soft — a phenomenon nail techs call “false drying.” Pressing a topcoat onto a falsely-dry layer drags the color beneath it. A minimum of two minutes between layers is non-negotiable for clean results.
| Common Mistake | Why It Happens | The Fix |
|---|---|---|
| Thick coats of polish | Trying to cover with one pass | Two thin coats, 3-stroke method |
| Not waiting between layers | Impatience / “looks dry” illusion | 2 min minimum per coat |
| Skipping base coat | Wanting to save time | Base coat = adhesion + protection |
| Tape pulling up polish | Polish not fully cured before taping | Press tape to palm first, apply 1+ hr after polish |
| Flooding the cuticle | Brush loaded too heavily | Wipe one side of brush before painting |
Expert Tips and Proven Strategies for Nail Designs That Actually Work
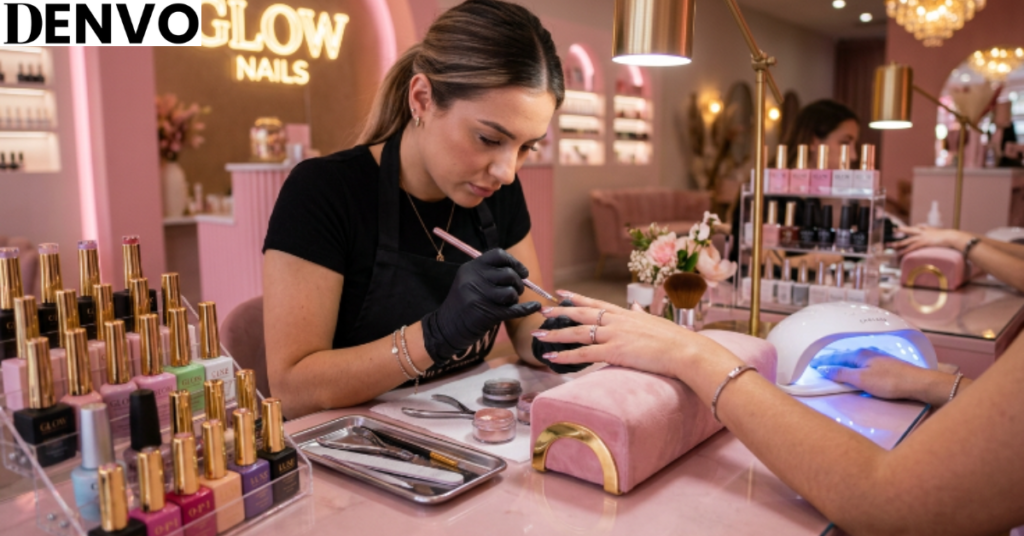
Here’s an observation I think most tutorials deliberately avoid: the tools matter more than the talent at the beginner stage. A striping brush makes straight lines effortless. A dotting tool creates perfect circles that freehand never could. Good nail tape (not regular Scotch tape, which has too much adhesive) creates geometry you could never paint. Investing $10–15 in three basic tools will immediately upgrade your results more than hours of practice with the wrong equipment.
The Beginner Toolkit Worth Buying
You need four things and only four things: a fine detail brush (for lines and accents), a dotting tool (for dots, flowers, marble textures), nail tape or vinyl stencils (for clean edges), and a fast-dry topcoat. That’s it. Everything else is supplementary. The brands matter less than you’d think at this stage — a $3 dotting tool from a craft store works identically to a $20 professional one.
The professional secret that changes everything is the cleanup brush. A small, stiff brush dipped in pure acetone, run along the cuticle line after your design is complete, transforms messy edges into sharp, salon-clean lines instantly. This single technique is what separates “DIY-looking” nails from genuinely impressive ones — and it takes about 90 seconds.
Pro Tip: Don’t buy “nail art kits” — they typically include tools you won’t use. Buy a detail brush, a dotting tool, and nail tape individually. You’ll spend less and get better quality on the pieces that actually matter.
Real-World Examples: 6 Easy Nail Designs That Consistently Impress
Let me explain why some designs consistently work for beginners while others look hard but aren’t — and vice versa. These six styles are ranked by how reliably they produce good results, not how they’re typically categorized online.
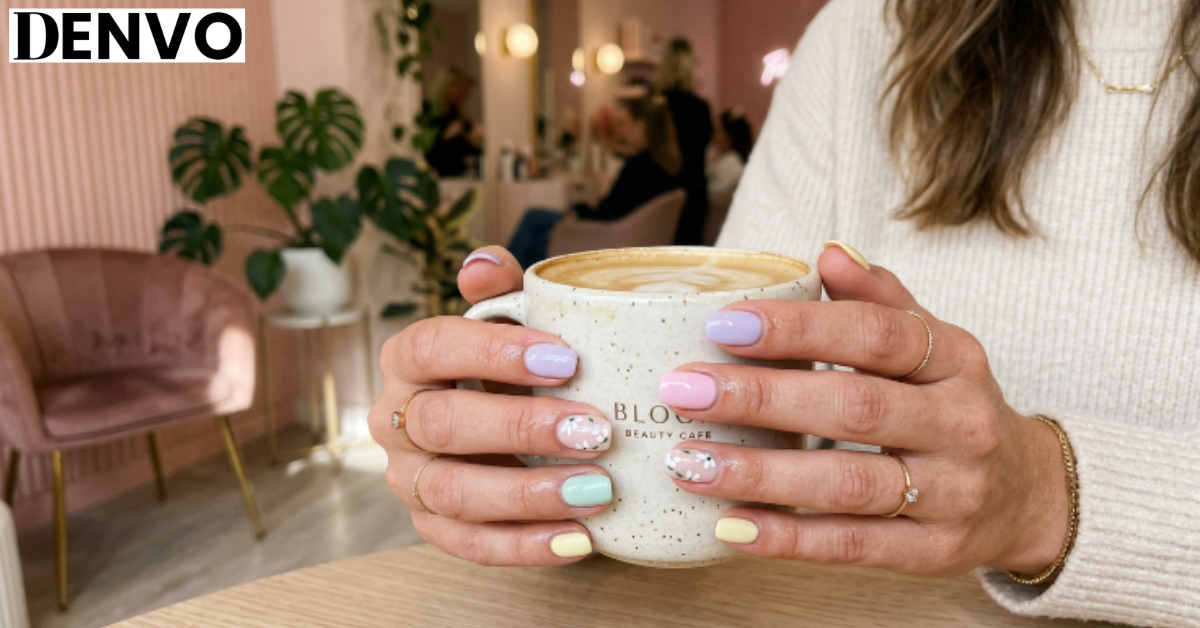
1. Negative Space Manicure
Negative space designs use the bare nail itself as part of the art. Tape off a section, paint around it, peel — done. Because the “blank” area is intentional, there’s nothing to mess up inside it. This design is nearly foolproof and photographs exceptionally well.
2. Half-Moon French Tip
The half-moon at the base of the nail (lunula) paired with a colored tip creates a modern, editorial look. Using reinforcement stickers (used for hole-punched paper) as guides makes perfect half-moons achievable with zero freehand skill required.
3. Color-Blocked Nails
Two colors, one piece of tape, and three minutes per nail. The diagonal or straight line created by tape is crisp in a way that would take years of freehand practice to replicate. Color blocking is also extremely trend-adaptable — the same technique works from minimalist to maximalist depending on your color choices.
4. Dotticure
A dotting tool and a single contrasting color. Dots arranged in grids, flowers, or random clusters read as intentional nail art every time. Because symmetry isn’t required (scattered dots look better), there’s very little way to get this wrong. A bobby pin dipped in polish works if you don’t have the tool.
5. Abstract Swirl
This one looks complex but is the most forgiving design on this list. Using a toothpick or fine brush, drag through wet polish in loose, organic curves. Because the design is inherently irregular, variations look like artistic choices rather than mistakes. White swirls on nude base are having a major moment right now.
6. Foil Accent Nail
Apply nail foil adhesive, let it dry to tacky, press foil sheet over it, peel back. The result looks like metallic leaf and is literally impossible to do “wrong” — every application looks different and every version looks expensive. It’s the highest perceived-effort-to-actual-effort ratio of any easy nail design technique.
Pro Tip: Rotate through these six designs over a few weeks rather than trying to master them all at once. Repeating the same technique multiple times builds muscle memory far faster than switching methods every session.
Step-by-Step: How to Do a Beginner Nail Design From Start to Finish
Let’s walk through the complete process for a color-blocked diagonal nail — one of the most achievable and visually impressive designs for beginners. Every principle here applies to almost any other easy nail design you’ll try.
- Prep your nails— File to your desired shape. Buff gently to remove shine. Apply a nail dehydrator or wipe with rubbing alcohol. Let dry completely (60 seconds).
- Apply base coat— One thin layer across the entire nail. Let dry 90 seconds. Don’t skip this — it protects your nail and gives the color something to grip.
- Apply your base color— Two thin coats of your lighter color. Use the 3-stroke method (center, left, right). Wait 2 minutes between coats.
- Apply nail tape diagonally— Once base color is fully dry (at least 1 hour, or use fast-dry topcoat first), press tape to your palm to reduce stickiness, then apply it diagonally across the nail.
- Paint your second color— Over the exposed section. One coat is usually enough here. Work quickly.
- Peel tape immediately— While the second color is still wet. Pulling at a 45-degree angle toward the nail center gives the cleanest edge.
- Clean up edges— Dip a small brush in acetone and run it along the cuticle line and any edges that bled.
- Apply topcoat— Cover the entire nail, sealing the edge where the two colors meet. This prevents chipping at the color divide.
Total time per nail: approximately 5–7 minutes once you’ve done it a few times. First attempt: plan for 15 minutes and don’t judge the result until you’ve done the full cleanup step.
Myths vs. Facts: What Most People Get Wrong About Nail Art
The internet has given us unlimited nail inspo and an equal amount of misinformation. Before you buy anything or write off a technique, here are the myths that are actively holding beginners back.
Myth
You need a UV/LED lamp for long-lasting nail art at home.
Fact
Regular polish with a quality fast-dry topcoat can last 5–7 days. Gel lasts longer but requires removal tools most beginners don’t own.
Myth
Short nails can’t pull off nail designs.
Fact
Short nails actually show off color-block and minimalist designs better than long nails — there’s less real estate to mess up.
Myth
Expensive polish performs better for nail art.
Fact
Formula consistency matters more than brand. Sally Hansen and Essie consistently outperform many boutique brands in texture and longevity tests.
Myth
You need a steady hand to do nail art.
Fact
Most impressive nail designs use tools, tape, or stamping — not freehand. Steady hands are only needed for a handful of advanced techniques.
The most damaging myth of all is that nail art is a natural talent you either have or don’t. Professional nail technicians spend thousands of hours practicing techniques that are, at their core, simple repetitive movements. What looks like talent is almost always deliberate practice with the right tools — starting with the exact beginner designs covered in this guide.
The Bottom Line
Three things matter more than anything else with easy nail designs: prep (always), thin coats (always), and cleanup with acetone (every single time). Get those three right and the actual design becomes almost secondary — your nails will look intentional and polished regardless of what pattern you’ve chosen.
The gap between “I can’t do nail art” and “my friends ask where I got my nails done” is smaller than you think. It’s not talent. It’s not expensive tools. It’s knowing which techniques are actually forgiving, and doing the prep work that 90% of people skip.
So — which of the six designs are you trying first? Drop your result in the comments. And if you’re ready to level up from here, check out our guide to intermediate nail techniques that still don’t require professional training. Your next manicure is going to be better than your last. Guaranteed.
FAQs
What are the easiest nail designs for absolute beginners?
For true beginners, the most forgiving easy nail designs are negative space nails, dotticure patterns, and color-blocked manicures using tape. All three rely on tools or techniques that produce precise results without requiring freehand painting skills. Starting with a single accent nail — doing the design on just one finger — also builds confidence and technique before committing to all ten.
How do you make easy nail designs last longer without gel?
Longevity without gel comes down to four things: proper dehydration before base coat, thin polish layers, a quality topcoat (Seche Vite and HK Girl are widely regarded as the best drugstore fast-dry options), and wrapping the free edge. “Wrapping” means swiping your topcoat across the very tip of the nail, sealing the edge where peeling and chipping most commonly begin.
Can you do easy nail designs on short nails?
Short nails are genuinely excellent for nail designs — particularly minimalist and geometric styles. The canvas is compact, which means less surface area for mistakes, and clean edge definition reads proportionally stronger on a shorter nail. Designs that work best on short nails include half-moons, single thin line accents, micro florals using a dotting tool, and bold two-color blocks. Avoid overly detailed patterns that get “lost” below a certain nail length.
What tools do I actually need for beginner nail designs?
The minimum toolkit for easy nail art at home:
- Fine detail brush (for lines and accents)
- Dotting tool or bobby pin (for dot work and organic textures)
- Nail tape or vinyl stencils (for clean geometric edges)
- Small stiff cleanup brush + 100% acetone
- Fast-dry topcoat
Total cost: $10–15. Nail art kits tend to include many tools you won’t use — buying individually gets you better quality on the items that matter.
How long do easy nail designs take to complete at home?
A complete at-home manicure with a simple design — prep, two base color coats, design, and topcoat — takes between 45 minutes and 90 minutes for beginners. With practice, this drops to 30–45 minutes. The drying time between coats accounts for most of this; the actual painting is typically 10–15 minutes total. Rushing the drying stages is the single most reliable way to ruin the result.
Are there easy nail designs that don’t smudge as fast?
Designs that use fewer layers and less product are inherently more smudge-resistant. Single-color nails with a minimal accent (one dot, one stripe) dry faster and hold up better than multi-layer designs. Stamped nail art — pressing a pre-inked design onto the nail — also tends to sit flatter than freehand layers, reducing the raised texture that catches and smudges. A fast-dry topcoat (not quick-dry drops) applied over any design significantly reduces the vulnerable window after painting.


