

Quick Answer
To paint a room like a pro, prep the surfaces thoroughly, use quality primer, choose the right sheen for your walls, apply paint in a W-pattern using a roller, and always work in natural light. Skipping prep is the single biggest mistake DIY painters make.
Most people who pick up a paintbrush get 80% of the job done and wonder why it still looks amateur. The difference between a room that looks “painted” and one that looks professionally finished almost never comes down to talent — it comes down to a handful of techniques most tutorials skip entirely.
Learning how to paint a room like a pro isn’t about buying expensive tools. It’s about understanding the order of operations, the logic behind each step, and the small habits that separate a $300 professional job from a $30 DIY disaster. By the end of this guide, you’ll know exactly what those habits are — and why they work.
Whether this is your first time holding a roller or your tenth room repaint, you’re about to change how you think about the whole process.
Why Painting a Room “Like a Pro” Actually Matters
Here’s what nobody tells you when you’re staring at paint swatches in the hardware store: the paint itself is probably the least important variable in this equation. Professional painters have known for decades that surface preparation accounts for roughly 80% of any paint job’s quality. The other 20% is technique and tools.
A badly painted room doesn’t just look off — it actively devalues a home. According to interior renovation surveys, fresh paint is consistently ranked among the highest-ROI home improvements, returning anywhere from 107% to 130% of its cost at resale. But that return only applies when the job is done right. A patchy, streaky paint job can actually hurt perceived value.
Think of it this way: paint is the first thing a visitor sees and registers, often before they’re even conscious of it. A well-painted room reads as clean, cared-for, and intentional. A poor one reads as “someone did this in a hurry on a Saturday afternoon.” That first impression matters more than most homeowners realize.
Pro Tip: Always buy 10–15% more paint than your square footage calculation suggests. Leftover paint from the same batch saves you from trying to match color exactly for touch-ups six months later.
How the Painting Process Actually Works (Step by Step)
Most DIY guides give you a list of steps. What they rarely explain is why each step happens in that specific order — and what goes wrong when you skip one. Let me explain why this matters before we get into the actual process.
Paint adheres to surfaces through mechanical and chemical bonding. Any contaminant — dust, grease, old wax, or moisture — breaks that bond. This is why rooms painted without cleaning or priming develop bubbling, peeling, or uneven sheen within 12 months. The primer isn’t just “the first coat of paint” — it’s a chemical bridge between your wall surface and your topcoat.
- Clear and cover the room. Move furniture to the center and cover with drop cloths. Remove outlet covers, switch plates, and light fixtures where possible.
- Clean the walls. Wipe down with a tsp (trisodium phosphate) solution or degreaser, especially in kitchens and bathrooms. Let dry fully.
- Repair imperfections. Fill holes and cracks with spackle or joint compound. Sand smooth once dry. Feather the edges so you can’t feel the patch.
- Tape and edge. Apply painter’s tape along trim, ceilings, and baseboards. Press the edge with a putty knife to prevent bleeding.
- Prime. Use a tinted primer matched to your paint color. One coat is usually sufficient on clean, previously painted walls. New drywall needs two.
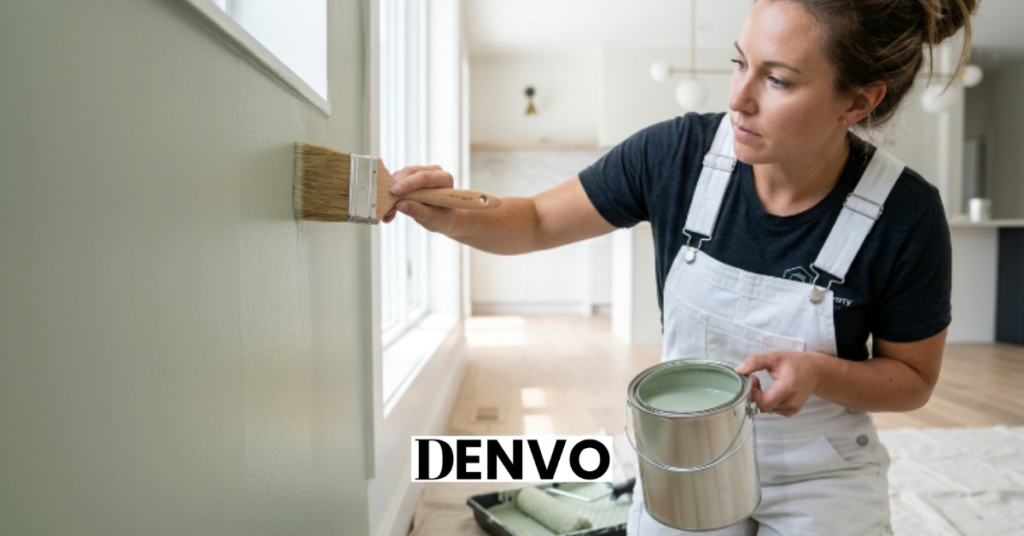
- Cut in first. Use a 2–2.5 inch angled brush to paint a 2-3 inch band around all edges before rolling.
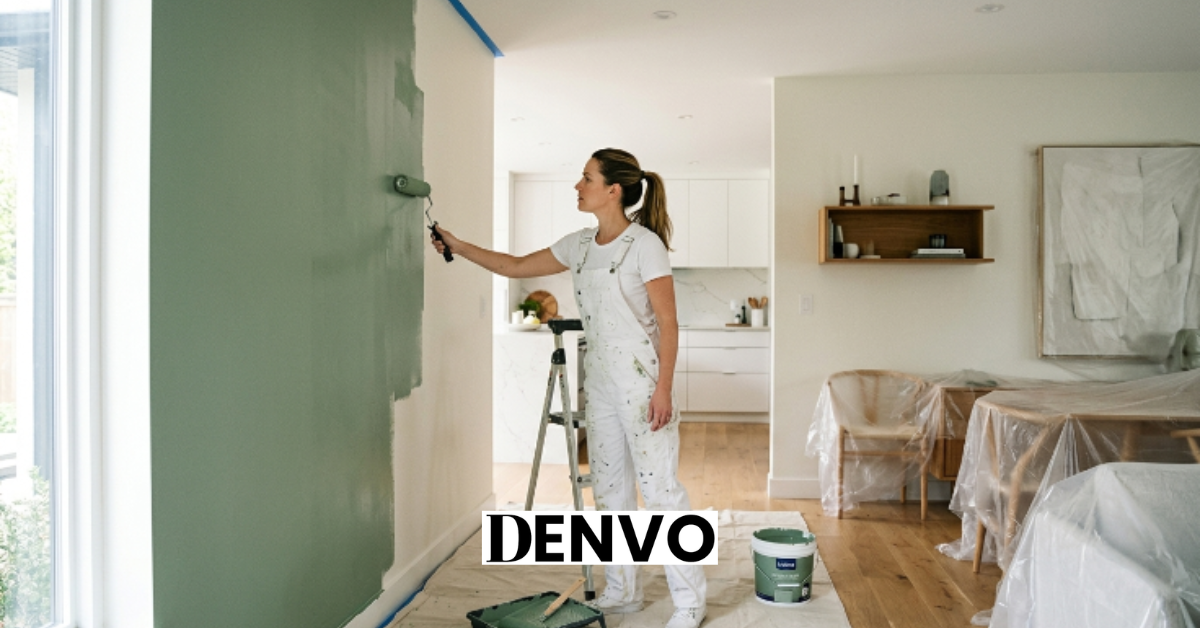
- Roll in a W-pattern. Load the roller, roll off excess on the tray ribbing, then apply in a W or M shape and fill in without lifting the roller.
- Work top-down, wall-by-wall. Start at the top of one wall, finish it completely before moving to the next.
- Apply second coat after drying. Wait the manufacturer’s recoat time (usually 2–4 hours for latex). Don’t rush — underdried paint drags and peels.
- Remove tape while paint is slightly tacky. Pull at a 45-degree angle. Waiting until fully dry risks pulling cured paint off with the tape.
Pro Tip: Professional painters always cut in and roll the same wall on the same day. Cutting in one day and rolling the next creates a visible lap line because dried and wet edges bond differently under light
Common Mistakes That Ruin Even Expensive Paint Jobs
Most people get this completely wrong: they assume the mistake happened during painting. In reality, most visible flaws are baked in before a single drop of paint touches the wall.
The most common culprit is skipping or rushing the primer step. Latex paint over an unprepared surface — especially over glossy paint — will slide, streak, and show every roller mark in raking light. Professionals never skip primer, even when painting a similar color over existing paint. The adhesion difference is dramatic.
The second most common error is using the wrong nap thickness on the roller cover. A smooth wall needs a 3/8″ nap. Textured walls need a 1/2″ or 3/4″ nap. Using a thick nap on a smooth wall creates stippling and texture where you want none. Using a thin nap on a rough wall means poor coverage and multiple extra coats.
| Mistake | What Happens | The Fix |
|---|---|---|
| Skipping primer | Uneven sheen, poor adhesion, bleed-through | Always prime, even same color repaints |
| Wrong roller nap | Stipple texture on smooth walls | Match nap to surface texture |
| Painting over dirty walls | Bubbling, peeling within months | Degrease and let dry before any coat |
| Removing tape too late | Paint peels away with the tape | Remove while still slightly tacky |
| One thick coat vs two thin | Drips, sags, uneven coverage | Two thin coats always wins |
| Cutting in the day before | Visible lap line at edge seam | Cut in and roll same day, same session |
Pro Tip: If you see brush marks in your cut-in work once it dries, lightly sand with 220-grit before applying the topcoat. Those ridges will show through and catch light in a way that’s very hard to fix afterward.
Expert Tips That Separate Good Painters From Great Ones
The truth is, most experienced painters share a few habits that beginners never pick up from standard tutorials — because they seem counterintuitive until you understand the physics behind them.
Load control is everything
Professional painters call this “the wet edge.” The goal is to always connect fresh paint to paint that’s still slightly wet — never to a dried edge. This means working at a deliberate pace: fast enough that your previous stroke hasn’t dried, slow enough to maintain quality. On a hot, dry day, this window can be as short as 90 seconds per section.
Light is your quality inspector
Always check your work with a raking light — a lamp or flashlight held at a low angle to the wall. This reveals every roller mark, drip, missed spot, and texture inconsistency. Professional painters do this after each coat. Most DIYers only discover these flaws after the room is reassembled, when fixing them means repainting.
Paint sheen selection matters more than color
Flat/matte hides imperfections but doesn’t clean well — ideal for ceilings and low-traffic adult bedrooms. Eggshell and satin offer a slight sheen with better washability — perfect for living rooms and hallways. Semi-gloss is highly washable and moisture-resistant — the right choice for kitchens, bathrooms, and trim. Using the wrong sheen in a high-traffic area means repainting within two years.
Pro Tip: Condition your paint on warm days. Adding a paint conditioner like Floetrol (for latex) extends the open time of your paint, reduces brush marks, and levels beautifully — especially in dry climates or summer heat.
Real-World Scenarios: What This Looks Like in Practice
Let me walk you through two real-world situations that illustrate exactly why technique matters in practice.
Scenario 1 — The Weekend Bedroom Repaint: A homeowner in Atlanta spends $180 on paint and supplies and completes a 12×14 bedroom in a single weekend. She skips primer because the wall is already white, paints in the afternoon when sunlight streams through the windows, and removes the tape Sunday night after everything dries. Result: bleeding at the trim, visible lap lines where she took breaks, and peeling at the tape line. Cost to fix professionally: $420.
The exact same room, painted with a $12 can of tinted primer, proper lighting, and tape removed at the 1-hour mark would have looked salon-quality. The total cost difference was under $15 and about 45 minutes of extra work.
Scenario 2 — The Bathroom Moisture Problem: A contractor consistently uses eggshell paint in bathrooms to save cost. Within 18 months, clients report bubbling and mold along the ceiling edge. Switching to semi-gloss and adding a single primer coat (bathroom-specific mold inhibitor formula) eliminated the problem entirely — and added maybe $22 to the project cost.
Myths vs. Facts: What Most Painting Guides Get Wrong
There’s a persistent layer of bad advice that gets passed down through hardware store conversations and well-meaning Reddit threads. Here are the most damaging myths — and what’s actually true.
❌ Myth
“You don’t need primer if you’re using a paint-and-primer-in-one product.”
✅ Fact
Paint-and-primer combos work fine for repaints over clean, similar-colored walls. For new drywall, stain coverage, or dramatic color changes, they’re inadequate.
❌ Myth
“More expensive paint always gives a better finish.”
✅ Fact
Mid-range paint ($40–55/gallon) with proper prep consistently outperforms premium paint ($75+) applied over an unprepped surface. Prep is the multiplier.
❌ Myth
“Stir the paint quickly — just give it a good shake.”
✅ Fact
Shaking introduces air bubbles that appear as foam and micro-craters in the finish. Slow box-stirring (pouring between two cans) is the professional method.
❌ Myth
“One coat is enough if the color is close.”
✅ Fact
One coat almost always shows variation in sheen when light hits it at an angle. Two thin coats build film thickness and give even, lasting coverage every time.
Pro Tip: Box your paint — pour all cans of the same color into a large bucket and mix together before starting. Even same-batch cans can have subtle tint variation that becomes visible at wall seams.
The Bottom Line
Here’s the honest summary: painting a room like a professional comes down to three things. First, prepare relentlessly — clean, patch, sand, prime, and tape before a single drop of topcoat goes on the wall. Second, respect the process — cut in and roll the same wall same day, maintain a wet edge, and let each coat dry fully before adding the next. Third, use your eyes constantly — raking light reveals every flaw while it’s still fixable.
The tools, the brand of paint, the color — those are details. The process is everything. A $35 gallon of paint applied correctly will outlast and outperform a $70 gallon applied carelessly every single time.
Your next step: grab a flashlight and check the walls in the room you’re planning to paint. Hold the light at a low angle. What you see in the next ten seconds will tell you exactly how much prep work is ahead of you — and that honesty will make the difference between a room that impresses and one you keep meaning to repaint.
What’s the room you’re tackling first? Drop a comment below — and if you’ve got a specific surface challenge (wallpaper removal, water stains, old gloss paint), ask your question and we’ll dig into it.
FAQs
How long does it take to paint a room like a pro if you’re doing it yourself?
A standard 12×12 room done properly — including prep, priming, two coats, and cleanup — takes most careful DIYers 6 to 10 hours spread across two days. Day one covers prep, patching, and priming. Day two handles cutting in, rolling, the second coat, and tape removal. Rushing it into one day almost always compromises quality, especially if humidity or temperature extends drying times.
What is the best order to paint a room like a pro — walls or trim first?
Professional painters consistently paint in this order: ceiling first, then walls, then trim last. Starting with trim seems intuitive, but wall rollers inevitably spray fine mist onto painted trim, meaning you’d need to touch it up anyway. Painting trim last lets you cut in cleanly against finished walls and gives you a crisp, sharp line that’s the hallmark of professional work.
How do professionals get such clean edges when painting a room?
Clean edges come from a combination of quality painter’s tape, a good angled sash brush, and a technique called “feathering” — where you stroke the brush slightly away from the tape edge rather than dragging along it. Some professionals skip tape entirely on trim they’ve painted hundreds of times, using a steady hand and a small shield. For most DIYers, tape plus the feathering technique produces nearly pro-level results.
How many coats of paint does a professional use when painting a room?
The standard professional approach is one coat of primer plus two coats of topcoat for a total of three coats. Dramatic color changes — going from dark red to light beige, for example — may require a tinted primer and three topcoats. One-coat coverage claims on paint cans are technically possible but only under ideal conditions (same-color repaint, perfectly smooth walls, high-hide formulas). Two coats is the reliable baseline for consistent, washable results.
Can I paint a room like a pro without a roller? What about brushes only?
Brushes alone produce visible stroke marks on large wall surfaces and are significantly slower than rollers. Rollers apply paint uniformly and with the right texture for most wall finishes. The professional combination is always a brush for cut-in work near edges and a roller for open wall areas. The only exception is detailed millwork, furniture, or cabinets, where brushes (or small foam rollers) produce better results than standard wall rollers.
What temperature and humidity conditions are best for painting a room?
The ideal conditions for painting are between 50°F–85°F (10°C–30°C) with relative humidity below 70%. Outside these ranges, latex paint doesn’t cure correctly — it may dry too fast in heat (causing brush marks), too slowly in cold (trapping moisture under the film), or bubble and peel in high humidity. Pros working in challenging conditions use fan ventilation, dehumidifiers, or schedule work during the cooler morning hours. This is especially important in bathrooms and exterior-adjacent rooms.


